Originally the plan was to have an interchangeable body and as you may or may not know the aircon unit has both hot water and aircon gas going through it. Both of these are integral to the engine. So if I wanted to separate the body from the chassis (and engine) to change over body styles it would have meant disconnecting the water and aircon gas everytime. Pain in the arse.
Because of this the plan was to mount the aircon under the floor so it could stay attached to the engine even when the body came off. I would have only had to have unplugged the electrics and the aircon ducting. This is why I needed to get the aircon underway so soon as it was going to be so integral to the chassis build.
Things have moved on a bit now though and as you know the whole interchangeable body thing has been canned, so the aircon can now be mounted more traditionally under the dash. This is what I will do too, as it will be a lot easier and will mean I can leave the unit full size as there won't be the size restrictions there would have been if I had been mounting under the floor.
Because of all that I have progressed the aircon as you have seen in the earlier blogs, so I may as well carry on and finish it, so I can then put it aside until I'm ready to install it. The next step is to refurb all the units. There are 3 of them, the Heater Blower Unit, The Aircon Condenser Housing and the Heater Core Housing.
Today I have reconditioned the Heater Blower. The Heater Blower is essentially a tumbler type fan driven by an electric motor. This unit also houses the Fresh Air/Recirculating Air controls as well.
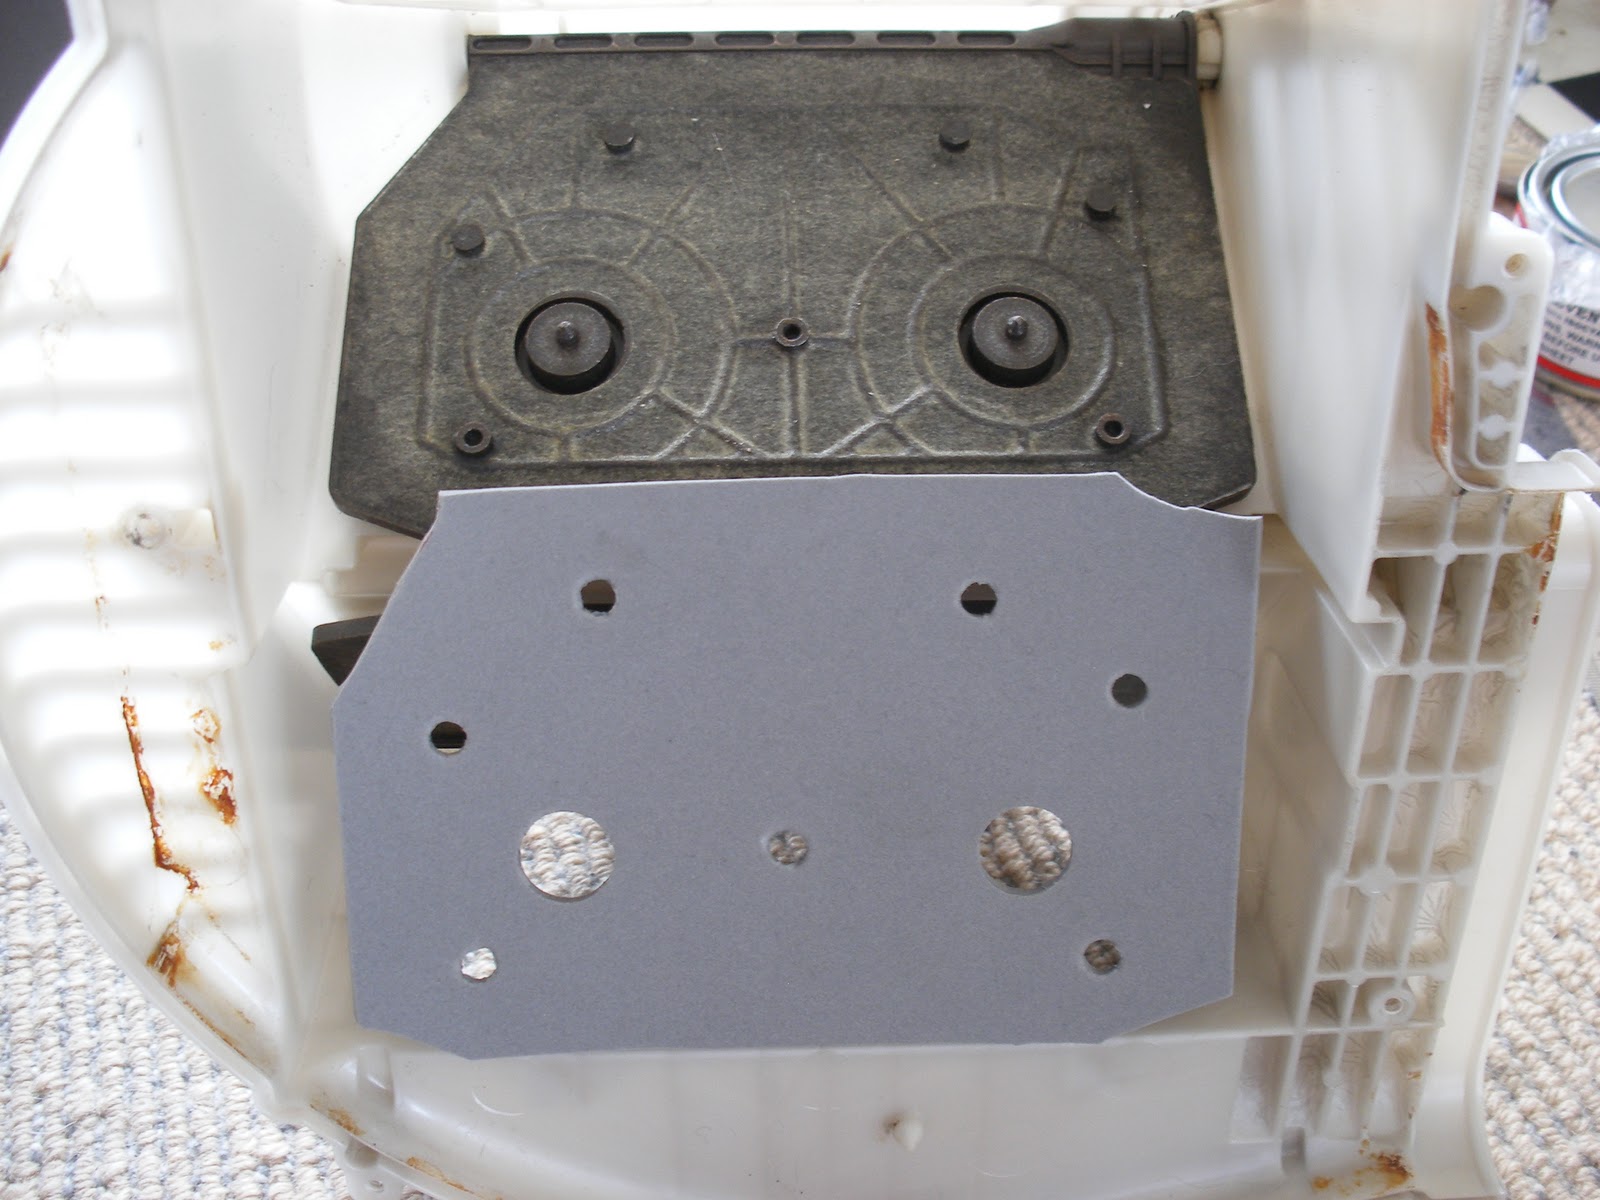
Here is the unit before I started.

I pulled it apart as it was full of gunge. You'll see what I mean when you see the before and after photo's a bit later on. First though, here are some pics of the refurb.

These are all the components. The silver panel at top right I painted with POR 15.

This is amazing paint and is named POR as it can be used to Paint Over Rust. It doesn't need a primer and unlike other paints it draws moisture so it will dry even on a damp day. I think that's why it works so well on rusty steel as it arrests the corrosion and draws the moisture out.....something like that anyway. What I do know is it dries like liquid steel crossed with tattoo ink. I used some black POR 15 on my last build and it said to wear gloves and remove from skin immediately....yeah, yeah whatever......tell you what, I only did that once.......it took about 3 weeks for that paint to come off! Not only that, you also have to be careful not to leave wet painted parts on anything as you won't get them off. As for the lid on the tin.....put a layer of plastic like a plastic bag between the lid and the tin. If not you will never get the lid off, if there is paint on the rim of the tin when you close it. What I refer to now as "good shit".
Here is that panel painted. It won't rust again!

I had to cut it to shape and also punch holes in it to line up with some locating pins on the flaps.


Once that was done I used Ados F2 (which is a contact glue) to hold them in place.

With a contact glue you coat both surfaces to be glued together. You then let them set until they are tacky, then you press the two parts together, it gives a really good bond and is also quite flexible so ideal for gluing yoga mats to control flaps.


Here they are in place.


You can see here how the flap closes against the grate. The spongy material acts like a seal.
With that all done and the POR 15 dry, I was able to reassemble the unit. Below are some before and after pics of the unit.
BEFORE
AFTER

BEFORE

AFTER

BEFORE

AFTER

Okay now thats all done....how does it work. Pretty basic really..... the unit just sucks air in one side and blows it out the other. The fan is a tumbler fan so it looks a bit like a wheel a hamster would run round in. The air goes down into the centre of it as per the pic below.
and the tumbler is turned by an electric motor at various speeds (depending on what fan speed you have your fan switch set at) and the small fins/blades in the tumbler push the air outwards through the hole in the side of the unit.
The black box on the side of the unit is a servo motor. It is a small motor that turns a lever to various positions.


This one controls the flaps on the top of the unit. When the flaps are out against the sides the blower draws air in from the top of the unit (this will be connected to outside air) for "Fresh" setting on the heater control panel.
Then when the servo motor is operated it shifts the flaps so that they close off the top opening and open the side grilles. So now the blower sucks air from inside the car (for "Recirc" setting on the heater control panel) and air from outside is cut off.
So if you are following a stinky old stock truck you can still have aircon without having to smell poo!

There you have it a reconditioned Heater Blower. Oh and yes the servo does operate and the blower motor does run nice and quietly.
.
Periods of extremely hot weather--heat waves--can cause serious health problems for everyone. In fact, among weather-related events, heat waves are a leading cause of death. Airconditioner is becoming a necessity because of climate change.
ReplyDelete