A large part of that has been trying to get the Jag rear back together and to get the firewall constructed, but its just not going to happen unfortunately so I have had to let Robin and Lynda Barnes from Koop de Glass down. Sorry guys. It certainly wasn't through lack of trying. I have spent just on 120 hours since we got back from our holiday early October so thats like working an extra 40 hour week each month.
Anyway, I thought in the meantime I'd give you an update on the firewall. You might remember in my last post about the firewall that I need to modify it significantly to go beneath the bonnet/hood line. This is so I can have the bonnet sides run right back to the leading edge of the doors and the top will go right back to the windscreen and hide the parked wipers.
Have a look here for a refresher.
Anyway, last time you saw it it looked like this.

Now its taken a bit of planning in my head for a few reasons.....
- It needs to have a recess for the wipers to go down into
- It needs to form a mounting point for the wiper motor and the drive units that the wiper arms attach to
- It needs to encompass the engine induction (air intake and filter)
- It needs to have venting to allow the engine to suck air.
Then on top of that....when all you have got is thin air where a firewall should be.... how do you make a firewall?
- I have had thoughts about making a wooden version first then taking a mould off it
- I even thought about making a polystyrene one by carving it out of a large block then I'd lay fibreglass over that
None of these seemed to work in my head especially as they need to have the air box cavity incorporated too. There probably is a better and easier way than what I ended up doing but here it is for what its worth.
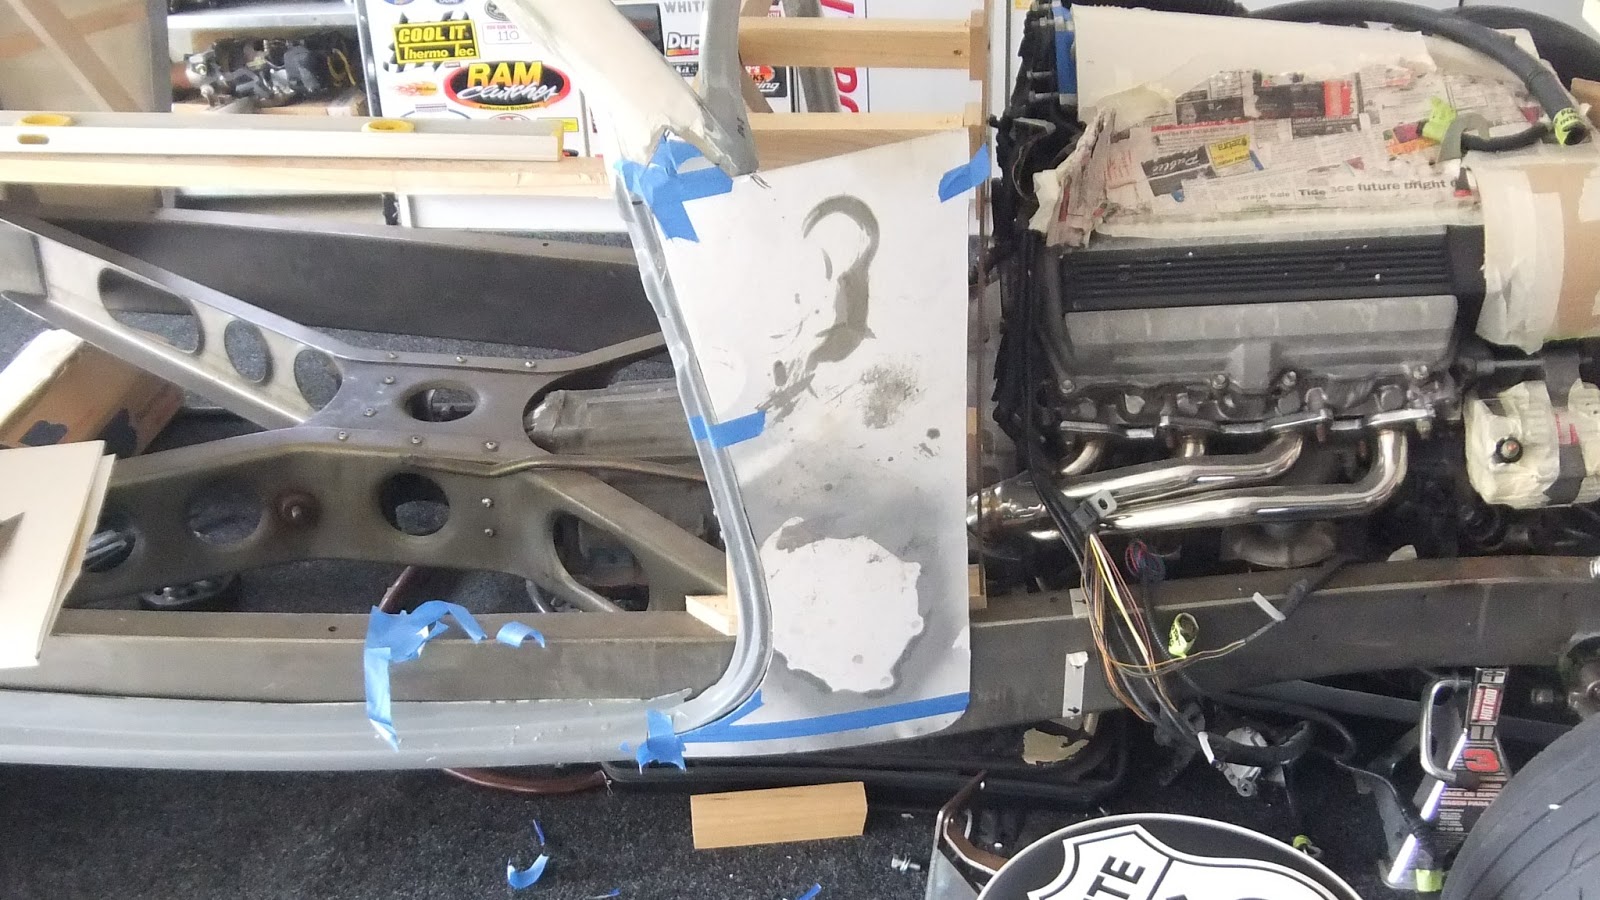
This is the starting point with the body in place on the chassis and butted up to the engine. This is the view if you stand beside the front wheel looking back to the firewall and bottom of the windscreen.

This is from inside the car looking again at the firewall (back of the engine) and the bottom of the windscreen opening.

This is what you see when you stand in front of the car.

I started by putting in some uprights that I clamped to the chassis. These are where the front face of the firewall will be, right in line with the back of the engine.

Here they are (left and right) again looking from the front of the car.

Now I need to make a firewall front panel. I did this using hardboard, and I stole the shape of the top edge from the old cowl that I cut off. You can see the new firewall is much narrower than the old cowl (remember its all scaled down and narrowed so it sits under the bonnet) you can see here I am just using the curve from each end and tracing that onto my hardboard (supplied courtesy of Roger...thanks Roger).


I cut one side first then used the off cut flipped over to the other side, so I could check I had the same shape both sides.

You can see here the off cut turned over and laid on top of the oposite side.

Here you can see the slight difference.

Once checked and tweaked, I cut the other side. Here is the finished product. Nice & symmetrical.

Now before I could slot that down in behind the engine I needed to cut a large curve in the bottom edge so the panel would fit over the transmission.....and a couple of small curves to clear the exhaust on each side.
Now I forgot to take a photo of this so I stole a later on picture which will give you the idea of the shape.

Ok with those shapes now cut out, the front panel can go down against the back of the engine and line up with the two vertical posts I clamped to the chassis earlier. Now that it is in place, all I needed to do was make some braces that came from the timber framing I already have holding the body together (while I make all these modifications) and screw them to the back of the hardboard panel.


This even took a bit of thinking ahead as once the fibreglass goes over the outside of the hardboard I will only be able to remove it from behind the firewall (inside the car) so its no good screwing the harboard to the frame from the engine bay when this is going to be covered in fibreglass, as I won't be able to get to those screws. That would be a fail!
To overcome that I inserted some blocks and screwed these to the hardboard then the braces were screwed to these from inside the car, where I could access the screws for removal later.

Here it is all in place.

Okay so what about the sides and the top? More templates required. Cardboard this time as there are compound curves (curves that go in all directions) involved and the cardboard bends nicely.
Start first with a rectangle that covers the area.......

.......then after a lot of drawing cutting trimming and standing back to view, here is the drivers side kick panel.
And here is the passengers side one.

Next I needed a panel to come down from the bottom of the screen and in line with the screen i.e. on the same rake/angle as the screen. This is where the wiper motor will be mounted (from the inside) and the spigots that drive the wiper arms will poke through. This needs to be on the same angle as the screen so the wiper geometry will work properly.

Here is another view. You can see how it is in line with the angle of the windscreen.

Lastly (when I say lastly thats just a figure of speech as we have a long way to go yet) here is the panel I will use to form the top of the cowl.

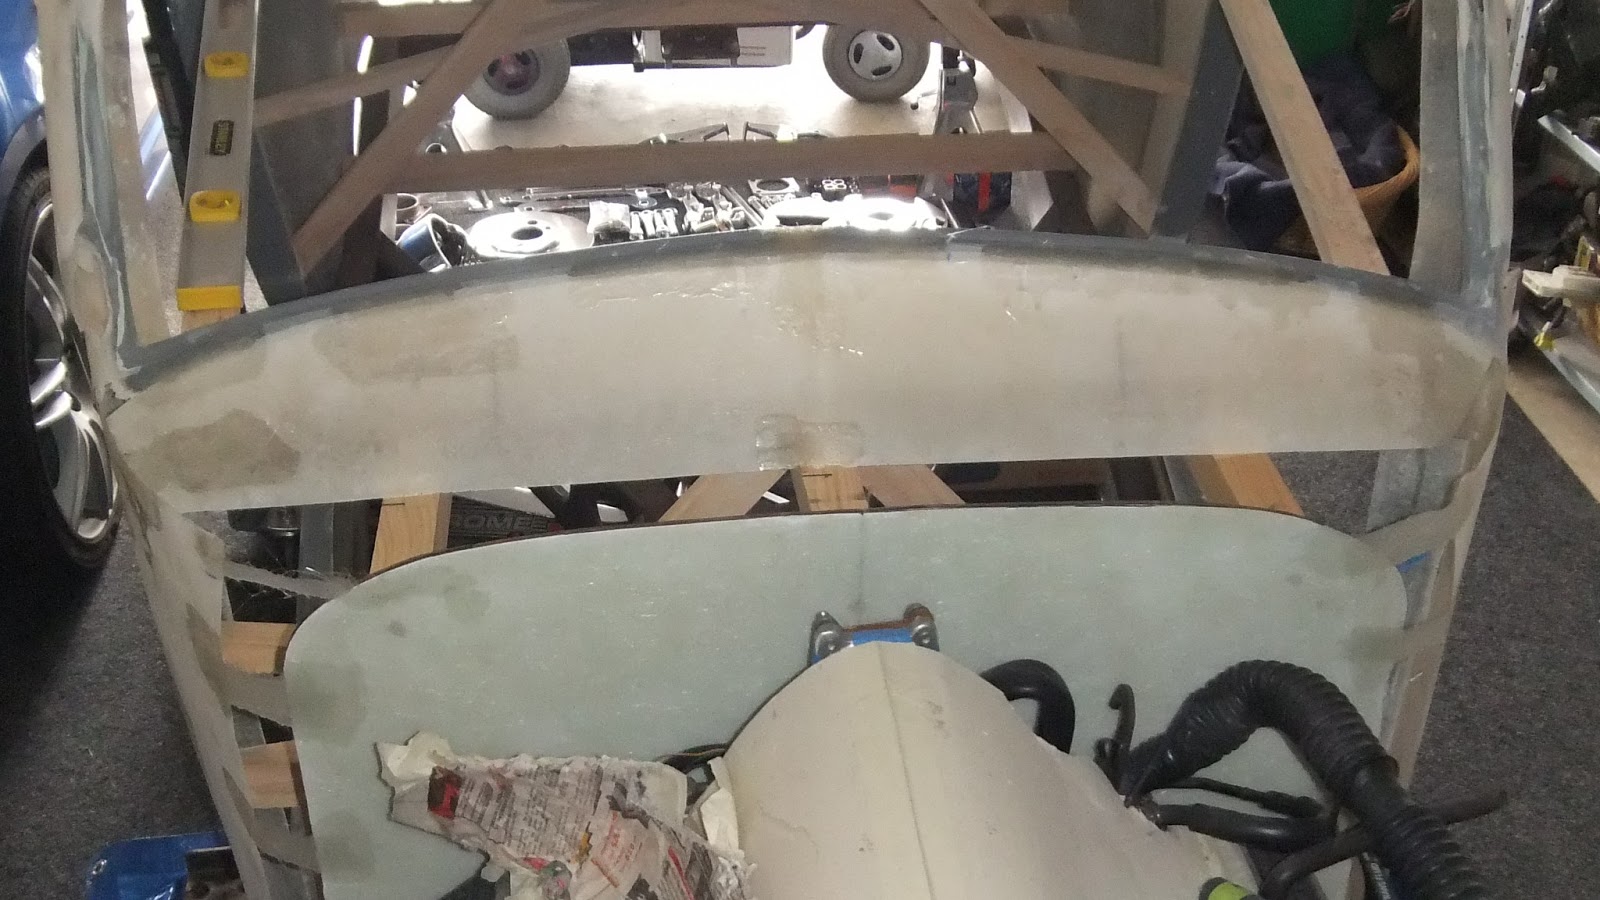
And here is the cowl top cut out and in place.

From this angle we are looking down the windscreen toward the cowl. The gap between the top and the screen is where the wipers will go down into when parked.

Now what about the gaps between the side panels and the front and the gaps between the front and the top.....don't worry you'll see why these are there later.

Oh and here's a look at the mess I made just getting to this point.

With all the templates fitting I now transferred them to a sheet of fibreglass, in fact its a mould that was taken off a late 50's Ford Bonnet I believe. Stan Andrews my fibreglass guy donated it to my cause. Thanks Stan.

It turned out really good as the curve at the back edge of the bonnet fitted the curve I wanted at the top of the two side panels. Perfect!

Here are all the pieces drawn out ready for cutting.

The firewall I cut from a separate flat piece of fibreglass I had on hand.

And here they are cut out and prepped ready for bonding together.

Next step was to tape them all into place ready to fibreglass together. If you look closely in these pics you will see I have put some fibreglass strips in between the bits of tape. Once this sets I can remove the tape and the panels will be bonded together.


Here it is next day with the tape removed. Now remember those gaps....well they are there as I don't want square corners. I want some nice curves.


What I will do now is glass in from behind. This will make a 45 degree join across the corner between the panels. Here you can see the firewall and the side panels are now completely joined. This is looking from inside the car toward the back of the engine.

Now this join as mentioned above is a flat 45 degree angle across between the two panels. From the outside though I want a nice curve. Thats where this magic stuff comes into play. Its called expanded foam. You spray it on and it blows up quicker than a bride does as soon as that wedding ring goes on.

Here it is from the outside. Its basically like polystyrene and cuts easily with a sharp knife and sands nicely as well, so I will be able to make a nice curve here. Once formed I will then start stacking my layers of fibreglass over the top of the foam and the very thin sheets of fibreglass that are basically now just going to be a shape holder for the layers I am adding. These top layers won't have joins (except where they are bonded back to the original body) so they will be quite strong and will form the final outer layer and will be thick enough to create a strong cowl and firewall.

Thats all for now. I will give another update once I have done more on it and that will include the construction of the internal airbox for the engine induction. Watch this space.