Okay so we've got our panel to primer stage. See my earlier blog on this click here.
Now that we have the panel completely covered in primer we have in theory completed most of our repairs and hopefully only have a few imperfections to deal with. For anything deeper than a mm or two you will still need to use body filler or bog, but tiny low spots (think stone chip here) you can fill the hole with "fine filler". This comes in two forms....a ready mixed tube.

This is what it looks like once applied.

Or a filler that you mix with a hardener.

This is what it looks like once applied.

Either is successful but in the opinion of Kevin taking the course he'd probably go with the one you mix up. It's a bit quicker setting so makes it a bit more practical when you are trying to progress your job. Also, while the ready mixed one is convenient, it is not as strong and does take longer to set. If you try and rush this stage and don't let the fillers set properly you will end up with the paint sagging at that point or shrinking, so you will still see the low spot you were trying to repair.
Ideally you should let this repair cure for a couple of hours to let the solvents in the filler cure/evaporate.
Once you have made these last few repairs add a guide coat to the panel. In the pic below I've used a guide powder but you can use guide coat spray also.

Knock back the repairs using 180 grit on a sanding block. The 180 grit ensures you cut through the high spot over the repair, while the block ensures the sandpaper is held flat. This means you are taking the excess filler away without sanding down the surrounding primer. When sanding, sand along the length of the car. Bear this in mind especially when sanding a panel off the car.


Once finished the entire surface will be flat and you will be able to see the different colour of the filler sitting in the imperfection that you filled, but you won't be able to feel it if you run your hand over it.

Blow the panel down then guide coat again before sanding with 320 grit on the orbital sander.


Don't use wet sanding on primer as primer is porous and will absorb the water and allow it through to the metal surface. This will slowly rust away under your paint.
Once sanded if you have any spots where you have rubbed through (even if it's through to bare steel) like below and also to cover the filler repairs you have just sanded....

You can touch these up with rub through primer.

First blow the panel down then wipe with prepsol and again with a dry rag.


You can now spray on the rub through primer.


If this goes on nicely you can get away with painting over without further sanding. If it's a big lumpy though, a light sand with the 400 grit sponge backed sandpaper will do the trick.
So now you have a prepared primered panel. Blow it down with the air gun, wipe it with prepsol and a rag. Wipe again with a clean rag. Blow again with the air gun. It's now ready for paint.
WHAT IF THE PANEL I HAVE IS A PANEL THAT HAS ALREADY BEEN PAINTED AND I'M JUST TOUCHING IT UP?
Sand the panel using 320 grit dry sanding. You can use your orbital sander here.This is one of the other participants in action.

Alternatively use 400 to 600 grit if wet sanding. With wet sanding the water provides lubrication and means the sandpaper cuts better, so you need to go to a higher grit count.
For edges (avoid these with your orbital sander) and hard to get places, use the 400 grit sponge sanding pads I showed you earlier.
Check your sanding. You should have removed all signs of gloss from the existing paint. It should look a bit like this.

You are now ready to prepsol, wipe down and paint.


Righto....we are ready for paint now so let's get the gun and the paint ready.
PAINTING AN ACRYLIC LACQUER PLAIN COLOUR (NON METALLIC)
We used Dulon AAA Colour in this example.
We used Dulon AAA Colour in this example.

This paint can go on over any compatible primer and also over any original sound paint that has been prepared as above. When mixing paint always stir well first.

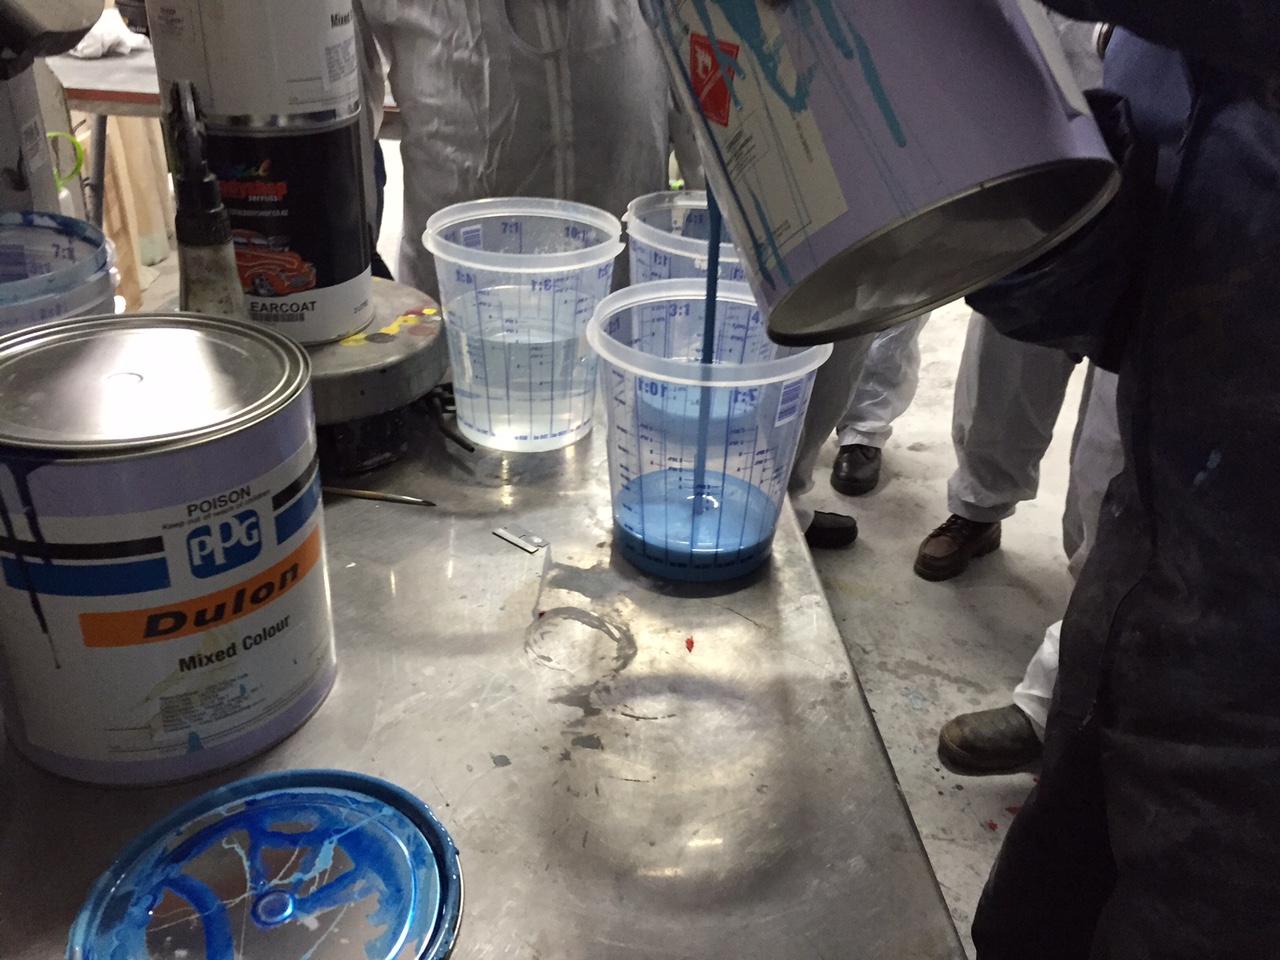
When using Dulon paint use Dulon AAA thinners (not just generic two way thinners) and stir well again. Mix 1 part colour to 1.5 parts thinners. So that's 500mls paint and 750mls thinners.


Always use a filter when pouring mixed paint into your spray gun.


Now to get the gun ready. Use a 1.5 to 1.8 spray nozzle on your gun. For
the demonstration we are using a 1.4mm nozzle and this worked fine, and
it is recommended to go to a smaller size if you are a beginner.
Set the spray gun air pressure at 35 to 40psi. For our demo we started at 40psi.
To set the gun open the air control right up.......open the fan control right up.....screw the fluid screw right in then back it off 3 turns. This is all a good place to start but you now need to tune the gun.
Set the spray gun air pressure at 35 to 40psi. For our demo we started at 40psi.
To set the gun open the air control right up.......open the fan control right up.....screw the fluid screw right in then back it off 3 turns. This is all a good place to start but you now need to tune the gun.

Turn your nozzle 90 degrees so that you get a horizontal spray fan. Spray for a few seconds onto a test sheet.

While continuing to hold the test sheet vertically, observe what the paint does. It should sag evenly across the fan spray pattern. In the pic below you can see it is light to the left and heavy (runs) to the right. This needs to be adjusted.


Kevin now adjusted the fan by closing it up by 1/4 of a turn. When tried again it was improved but still a little heavy on the right, so a further 1/4 on the fan control knob. Here's the end result. Nice and even!

Have you wiped over with prepsol? Wiped it down, blown it down and wiped it again with a clean dry rag?
Good. Now, wipe it again with a tack rag (this is a sticky rag) that will pick up any bits of fluff and lint that might still be on the surface.
Let's go painting!
First up we are painting a Dulon solid colour (as opposed to metallic) that serves as a top coat and does not need a clear over the top.
HOW MUCH SHOULD GO ON?
When painting top coats, you are going to need about 4 to 6 coats to get good cover, depending on colour. For yellows and whites you may even need as many as 10 coats.
When applying the first coats it should go on medium wet. It's far easier to deal with a run that it is to try and cut and polish out dry spray. That said not too wet, as you know from the mix ratio above there are a lot of solvents and these can eat into any fresh primer or fillers.
THE TECHNIQUE
Once again always keep the gun perpendicular to the job. It's okay to lay the gun on its side vertical on a side panel and horizontal on a top panel and keep a constant distance from the panel. For a beginner a good rule to follow is to do the hang loose hand signal. The distance from the tip of your thumb to the tip of your little finger is a good guide for distance away from the job.

You should overlap your strokes by about 50% on the first heavier coats and you can up that to 60% on the heavier finishing coats. To achieve the heavier coats you can either come closer to the surface or alternatively stay the same distance away and just slow down the pace of the strokes.
In the video below you can see the technique in action for a first coat, but note this is the instructor who is much more proficient so he gets away with being a lot closer to the panel than you would if you were a beginner at this. The video gives a good indication though of how to hold the gun perpendicular, the evenness of the strokes and the pace.
This pic with reflection shows you how wet the paint should go on.

And here is my first crack at it! Pretty happy!

Flash time between coats is 2 or 3 minutes. That's the time required for the solvents to evaporate enough in order for another coat to be applied. You can usually tell when it has flashed off as the finish will be more dull than a wet glossy freshly applied coat. You need to apply more coats to allow margin for when it comes time to cut and polish. This will help if there are blemishes to buff out and it also means you have more paint so less risk of polishing through to the paint with the polishing machine when going over swage lines and panel edges.
In this next pic you can see what the finished panel (5 coats) looks like once dried. This was about 5 hours drying time and some of that was in the heated paint booth, so at home you really won't be doing anything with the paint work at least until it's hardened overnight.
You can also see in this pic it is quite glossy but it is quite rippled, what is sometimes referred to as "orange peel" for obvious reasons.

To get a super glossy and glass like finish you first need to sand the panel with 1500 grit wet and dry sandpaper WITH WATER. It's okay to use water now as the top coat is not porous of course and the primer is sealed off completely. Kevin's hot tip is that it helps to put a squirt of detergent in the water.
Use a flexi block (soft sanding block) as bare hands can result in your fingertips pressing harder so you get a striped sanded effect rather than an even pressure across the face of the pad.
Always sand in straight lines. You can go in different directions, but always straight lines. Also take extra care at the edges or on ridges like swage lines. It pays to sand the big areas first then come back and carefully and lightly sand the edges and swages.

Every so often you can use the edge of the sanding block to squeegee off the water so you can check progress. You are looking for a matt finish, no orange peel and no gloss at all.


If you rub through the paint there is no easy fix. It's back to sanding the gloss off and painting all over again. As such you need to be INCREDIBLY PATIENT AND INCREDIBLY CAREFUL WHEN SANDING.
Now you are ready for the cutting part of the cut and polish. For this you really want an electric polisher.
The first phase you use a cutting compound such as this.


And you use a sheepskin buff at this point. The video shows this in action. This should be on a low speed. Half speed is probably too fast. You can go over the edges with the polisher but as with the sanding if you rub through the paint there is no easy fix. It's back to sanding the gloss off and painting all over again. As such you need to be INCREDIBLY PATIENT AND INCREDIBLY CAREFUL WHEN POLISHING.
A tip is to go 'over' edges, not 'into' edges. And yet another tip....you can put tape over sharp edges then go back and take the tape off later and polish the edge by hand.
Once you have done this you then move to a black sponge like soft pad on the machine and use the machine cut polish which is much finer cutting.

Once this is done you can review your work. If there are still fine scratches from the 1500 grit wet and dry, just go back to the lamb skin buff and cutting compound, then repeat the soft pad and machine cut polish.
PATIENCE IS THE KEY. It really pays off if you take the time. These next two pics show the same panel, before and after cut and polish.


Lastly you can wax the panel, but you should wait at least 6 weeks to do this to enable all the solvents to evaporate fully.
PAINTING WITH METALLIC BASE COAT CLEAR COAT
Painting metallic is a bit more complicated versus the Dulon solid colour mentioned above as there is no gloss in a metallic. It goes on flat and you need to put clear coats on top of that. This serves 2 purposes. It gives the paint finish depth and it also protects the paint from harmful UV. Clears can be flat, satin of gloss.
Panel prep for Metallics is the same as mentioned above for Dulon solid colour, and like the solid colour, metallics can go over a newly primered surface or a sound previously painted surface if prepared as outlined earlier.
Here is my prepared panel

With a metallic you should thin it down 1.5 to 1. That's 1.5 thinners to 1 part paint e.g. 500mls paint and 750mls thinners.

This is what you will use for the the first 2 or 3 coats, then you change the ratio to increase the thinners by adding 50% more thinners. That is if you have a litre of mixed paint, add 500mls more thinners. This is for the mist coats that I will talk more about soon.
Remember to stir your paint well.

In this example we used Dulon AAA Basecoat metallic

Remember to always filter your paint into your gun. Also remember before you start painting that the panel should have been blown down, prepsoled with a clean rag, blown down, wiped again with a clean rag, blown down and lastly wiped with a tack cloth. You can also give the job a quick blow down with the spray gun by pulling the trigger lightly so only air comes out and no paint.

Righto lets paint!
The first coats you put on should be fairly heavy to get cover. As mentioned above you need 2 or 3 of these and the flash time between coats should be about 3mins. The paint goes on quite wet and glossy.
The first coats you put on should be fairly heavy to get cover. As mentioned above you need 2 or 3 of these and the flash time between coats should be about 3mins. The paint goes on quite wet and glossy.

But will go quite satin like once flashed off. You can see the difference in this next pic. Ignore the masking I will come back to that soon.

Once you have got your 2 or 3 heavy coats on its time to do the mist coats. The idea of the mist coats is they blend the colour. What you can get with metallic especially is a very striped effect with each pass of the gun. The mist coats help to blend this a little. You'll remember I said above that the mist coats should be the same paint but thinned a further 50%. This makes it very thin.
When applying mist coats there is no need to adjust the gun and you should aim for similar overlap to the earlier coats, but you go very, very fast with your strokes.....a very quick flick....and you can go in all directions.
Once you have done that a couple of times you are ready for clear coat. No sanding in between just a quick wipe with the tack rag. Before we go on though, let's take a quick look at two tone paint.
TWO TONE
We masked the guard up so we could have a go at doing two tone paint, where we masked off the top of the guard after we finished spraying the blue with its 3 heavy coats and 2 mist coats. This was left a while before masking so that the paint had a chance to cure a bit. You probably want to allow an hour or so at home.
To mask up for another colour like this you don't use masking tape as that will leave you with a furry edge. Instead you use Fineline tape which is kind of plasticy like cellotape or electrical tape but it works like masking tape in so far as it doesn't react to the paint and it can be easily removed after painting.

Now while you need to leave it an hour before putting this tape on over
fresh paint it is important to note the you MUST PAINT BOTH COLOURS AND
THE CLEAR ALL ON THE SAME DAY. This is because painting subsequent coats
over previous coats that are still soft will give much better keying as
they kind of melt together.
So as soon as you have cleaned your gun, mixed up the new colour, masked up the panel and wiped it down with a tack cloth, you should go again with the new colour.
As you can see we have now painted the red. It's still wet in this next pic, hence the gloss, but it will flash off and go quite dull just as the blue did. This now has 3 coats of red and 2 mist coats.

Soon after you finish applying the paint and it has flashed off, you can remove the masking.


Next up its time to do clear coat.
CLEAR COAT
CLEAR COAT
So we have
our colour down. You need to wait about 30mins before applying clear so
that the thinners in the clear don't make the colour bleed.
Mix the Dulon AAA clear just as you did the paint. 1 part clear to 1.5 parts thinners, so 500ml clear and 750ml thinners. Remember too to stir well and filter it into your gun.
The first two coats should be medium wet but not too wet as that could lift the fresh paint.
Mix the Dulon AAA clear just as you did the paint. 1 part clear to 1.5 parts thinners, so 500ml clear and 750ml thinners. Remember too to stir well and filter it into your gun.
The first two coats should be medium wet but not too wet as that could lift the fresh paint.

Once these first 2 clear
coats go off though they seal the colour so you can go much heavier
with the next 2 clear coats to get a good cover for more margin when
cutting and polishing but also to get more depth in the paint job. With
these two top coats you can be very generous with the clear. Come in
closer to the job and make slow stokes with the gun.


On the last
coat you can do what is referred to as a "double header". This is where you
apply a thick coat and go straight back and do another thick coat over
the top without allowing the first one to flash off.
Once this is all applied you can leave it overnight and begin the cut and polish phase. I have covered this earlier of course.
Alternatively you can knock the clear back with 1000 grit (wet) to remove the Orange peel and any gloss, then repeat the clear process again. You can do this a week or two later even. Because you are sanding the earlier clear, there is something for the new coats to adhere to.
This extra clear will give a much better "deeper" result, but of course is more time consuming. This is why you pay big money for hot rod paint jobs as they go to these lengths to get it looking perfect.
SOME OTHER STUFF......
BETWEEN COLOURS AND ALSO WHEN CLEANING UP
Clean out the gun with two way thinners or you can buy gun wash. Fill the cup with thinners and remove gun from compressed air supply. Pull the trigger and thinners will run through. This will clear a good amount of the paint. Hook back up to air and spray the thinners through also. This will leave the gun clean enough if you intend using it again the next day.
Ideally though disassemble the gun and clean it properly especially for long term storage and between colours.
WHAT IF I HAVE A RUN?
Kevin kindly demonstrated what to do here. Oh and by the way it's easier to deal with a run than it is with dry spray, so when painting bear this in mind and try and tend to be a bit more generous with the paint.
In short though, what you do with a run though is let it harden (wait a couple of hours) and using a razor blade on its edge scrape the run away.


When scraping the run away (until you have a flat surface again) its very easy for the corner of the blade to dig in. A tip here is to put tape over the outer corners of the blade so that the corners don't damage the paintwork.

If this is Dulon top colour coat (single colour top coat acrylic lacquer no clear required) then you can do this scrapping, sand it with 1500 grit and then use the polisher with cutting compound to finish.
The same goes for clear coat.
If however the run was in a metallic base coat you will need to repair the run as above with the blade, smooth the area with 320 paper and then respray the colour. You can then progress to clear coat as you would normally.
BLENDING PANELS - WHEN TOUCHING UP A SCRATCH ON JUST ONE PANEL
To do this, you complete the repair, then sand the panel being repaired and the adjacent one. You then paint the panel with the scratch in it and a bit of the adjacent one. You then clear the entire panel and all of the adjacent panel.
WHEN YOU GET USED TO USING THE SPRAY GUN BE BRAVE!
Try opening the fluid valve up more and paint faster. Keep the same distance from the job and the same fan and air setting....just go faster with your strokes.
I look forward to seeing the results when I put this into practice!